Background
Not long ago I have decided to move all of my workloads running in my home lab to Kubernetes. I wanted to learn more about Kubernetes and even practice for the Certified Kubernetes Administrator (CKA) exam. So I deployed two Ubuntu Server 20.04 machines on top of my Esxi node. One for the master node and one for the worker node. Naturally I wanted to encrypt the access to the Kubernetes Ingress resources via trusted certificates instead of the default ones.
Let’s Encrypt
I am sure everyone working in the tech space has already heard something about Let’s Encrypt. It is a non-profit-organization issuing TLS certificates for free that are valid for 90 days. Let’s Encrypt lets you issue certificates via two different ACME challenges.
- HTTP-01
- DNS-01
As we will see later I am using the DNS-01 challenge because it allows me to issue certificates without creating a port forwarding rule in my internet router. Up to now, I have used certbot to issue certificates.
certbot -d damn.li --manual --preferred-challenges dns
However, for Kubernetes I wanted to go a different way where I issue the certificates directly on Kubernetes.
Cloudflare
I have been using different Cloudflare services for a few years. DNS is one of these services, and it is related to the DNS-01 challenge. Therefore, some API-Keys from the Cloudflare dashboard were required.
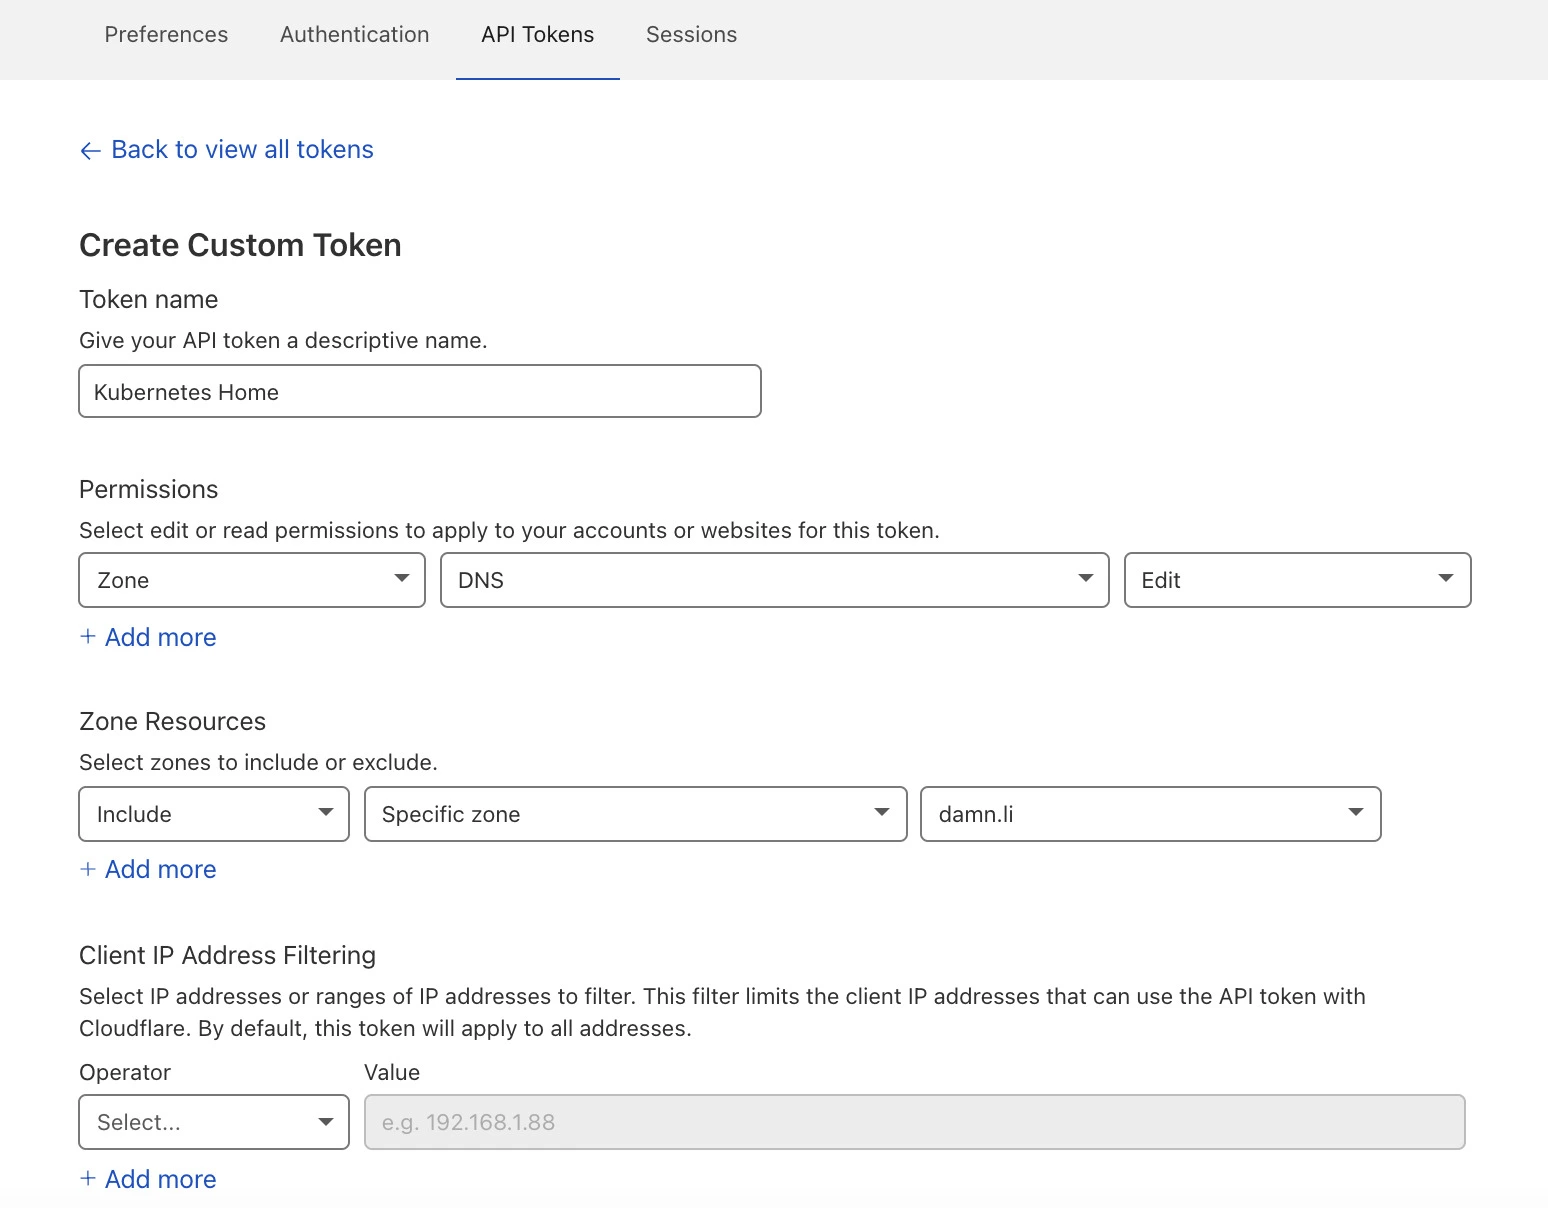
After obtaining the API-Keys, the only task left was storing the keys in a Kubernetes secret.
apiVersion: v1
kind: Secret
metadata:
  name: cloudflare-api-token-secret
  namespace: cert-manager
type: Opaque
stringData:
  api-token: <API Token>
Applying the yaml files as always.
k apply -f secret.yaml
With this secret, Cert-Manager will be able to create the required DNS TXT record with a TTL of 2 minutes in Cloudflare.
Cert-Manager
While doing some research on what is the best approach to issue certificates on Kubernetes, I came across Cert-Manager, and it seemed the right way to go. Cert-Manager supports different sources like HashiCorp Vault, Let’s Encrypt, Venafi and private PKI. I went ahead, installing Cert-Manager via Helm.
   helm repo add jetstack https://charts.jetstack.io
   helm repo update
   helm install \
   cert-manager jetstack/cert-manager \
   --namespace cert-manager \
   --create-namespace \
   --version v1.5.4 \
   --set installCRDs=true
Now it was time to create the ClusterIssuer. Note: With Issuer, you can create issuers that are tied to a specific Kubernetes namespace.
apiVersion: cert-manager.io/v1
kind: ClusterIssuer
metadata:
  name: letsencrypt-prod
  namespace: cert-manager
spec:
  acme:
    email: <email>
    server: https://acme-v02.api.letsencrypt.org/directory
    privateKeySecretRef:
      # Secret resource that will be used to store the account's private key.
      name: le-issuer-acct-key
    solvers:
      - dns01:
          cloudflare:
            email: <email>
            apiTokenSecretRef:
              name: cloudflare-api-token-secret
              key: api-token
        selector:
          dnsZones:
            - "damn.li"
            - "*.damn.li"
Creating the ClusterIssuer was only half of the story because what I wanted were certificates.
apiVersion: cert-manager.io/v1
kind: Certificate
metadata:
  name: le-grafana-damn-li
  namespace: monitoring
spec:
  secretName: le-grafana-damn-li
  issuerRef:
    name: letsencrypt-prod
    kind: ClusterIssuer
  commonName: "grafana.damn.li"
  dnsNames:
    - "grafana.damn.li"
Note the reference to the ClusterIssuer. Also adjust the commonName and dnsName according to your domain.
Applying the yaml file as always.
   k apply -f ClusterIssuer.yaml
   k apply -f CertificateGrafana.yaml
Nginx Ingress Resources
The only step left was telling the Nginx Ingress Resource for Grafana to use the issued certificate instead of the default one.
ingress:
  ---
  tls:
  - hosts:
    - grafana.damn.li
    secretName: le-grafana-damn-li
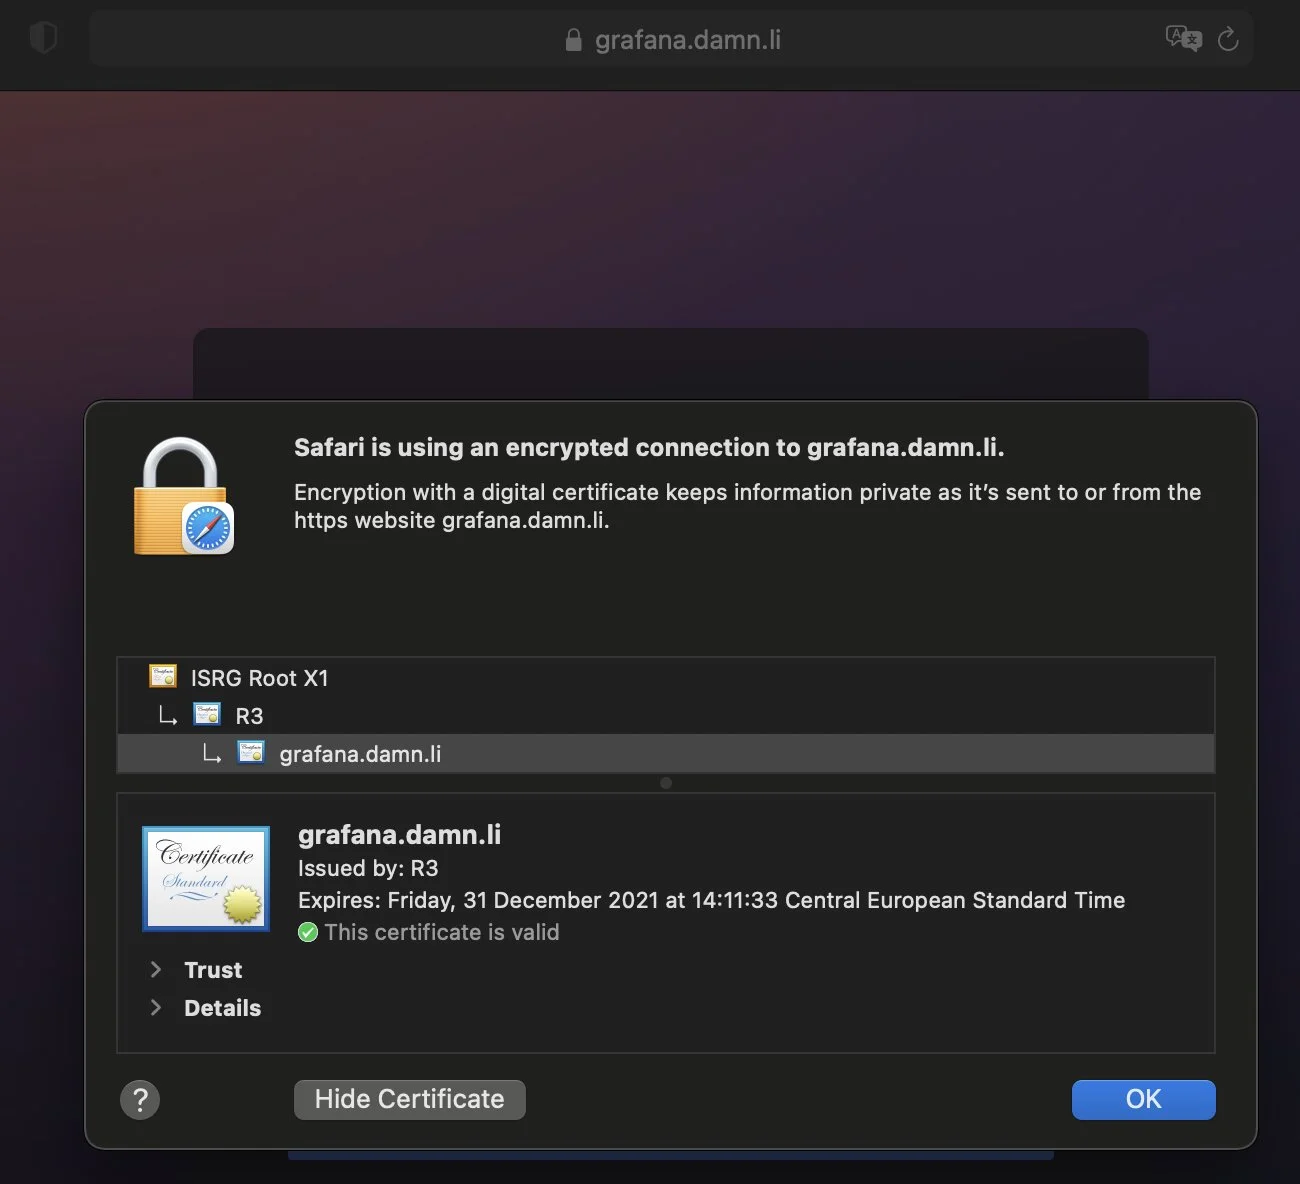
Final check
A final check and it worked.